Monday, July 23, 2012

Lemon Blueberry Cupcakes with a Limoncello Glaze

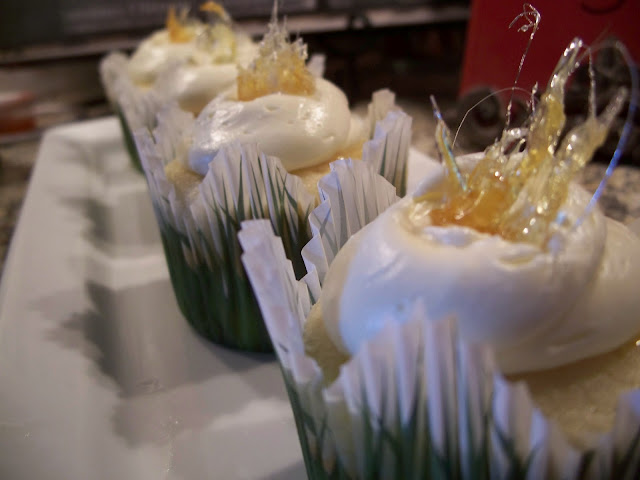
Lemon Blueberry Cupcakes with a Limoncello Glaze and Buttercream Icing


This cupcake is so refreshing for those hot summer days. The citrus that just brightens your taste buds and just a hint of creaminess from the buttercream makes this tasty cupcake a favorite. I candied some lemon zest and used them to decorate the cupcakes. Instead of removing the zest from the sugar mixture and coating them in sugar, I just poured everything on a silt pad, let cool so I could separate and pull the sugar lemon zest into whatever shape it created. Either way you decide to do the zest, it makes a beautiful presentation on top of your cupcake. Give them a try....you will love them!

FOR THE CUPCAKES                             Makes 12 to 15 cupcakes


2 1/2 cups all-purpose flour
2 1/2 tsp baking powder
1/4 tsp salt
1 1/4 cups whole milk, room temperature
2 1/4 tsp, pure vanilla extract
8 Tbs unsalted butter, room temperature
1 3/4 cups sugar
2 large eggs, room temperature
juice and zest from 2 lemons
1 cup fresh blueberries

FOR THE GLAZE

1 1/4 cup 10 x sugar
1/2 tsp lemon zest
3 Tbs. limoncello
1/4 tsp. pure vanilla extract

For the cupcakes:


  • Preheat the oven to 350.  Line a cupcake pan with paper baking cups, or grease the pan with butter if not using baking cups.
  • Sift together the flour, baking powder, and salt on a sheet of parchment paper, wax paper, or bowl (which I use) and set aside.
  • Combine the milk and vanilla extract in a liquid measuring cup.
  • In a bowl of a stand up mixer, cream together the butter and sugar for 3 to 5 minutes until it is light and fluffy.
  • Add the eggs one at a time, mixing slowly after each addition.
  • Slowly add one third of the dry ingredients followed by one third of the milk mixture. Mix slowly, and then add another third of the dry ingredients, followed by one third of the milk. Mix slowly until incorporated. Stop to scrape down the bowl as needed. Then, finally add the last third of dry ingredients, followed by the milk mixture. Mix slowly until fully incorporated.
  • Add the lemon juice and the lemon zest, and mix slowly.
  • Using a spatula, gently fold in the blueberries into the batter. (note: toss berries in flour so they won't sink to bottom of cupcake when baking).
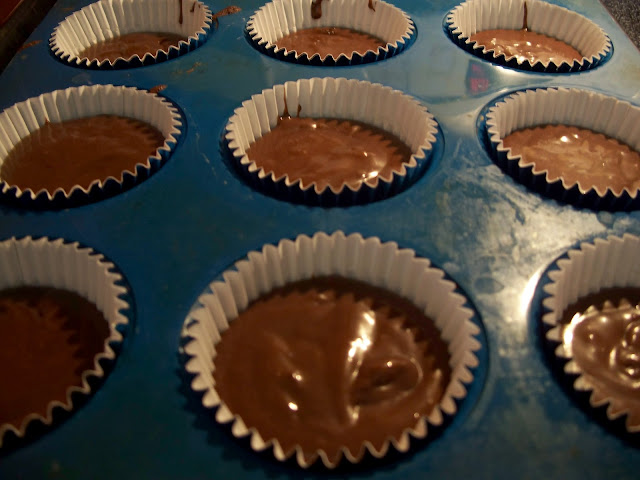
  • Using a standard size ice cream scoop, scoop batter into the cupcake pan until each well is two-thirds full and bake for 16 to 18 minutes (I start checking around the 15 minute mark).
For the citrus glaze:


  • Whisk together the 10 x sugar, lemon zest, limoncello, and the vanilla extract in a small bowl, and heat in a small saucepan on low heat until fully incorporated. Let cool for 10 minutes.
  • Pour glaze over cupcakes.

CANDIED LEMON ZEST


  • 2 lemons
  • 1/3 cup water
  • 1/3 cup sugar
  • sugar to coat zest strips


Directions
  • Wash lemons thoroughly. Trim zest from lemons using a vegetable peeler. Cut wide strips, being careful not to cut into the white pith layer below.  Cut zest strips lengthwise to create thin julienne strips.
  • Place julienne strips in a small sauce pan and cover with cold water. Cook over medium heat until the water comes to a simmer. Continue to simmer for 6 minutes.
  • Remove from heat, drain strips and then return them to the sauce pan.  Add water and sugar to the lemon strips in the sauce pan. Bring the mixture to a simmer. Continue to cook over low heat until the lemon strips turn translucent. The water and sugar should be starting to thicken. Cooking time will be approximately 10 to 15 minutes.
  • When done cooking, remove strips from the pan and spread out on a sheet of waxpaper. Separate the strips on the wax paper so they are not in clumps.
  • Once they have cooled slightly, roll in sugar until they are well coated.

Enjoy!


Sunday, June 24, 2012

New Age Potato Salad Bites

NEW AGE POTATO SALAD BITES


Hello Ladies!

  I know, it has been since March since my last post. I have been trying to get my business up and running and have devoted all of my spare time in trying to figure out the business world!

I just wanted to share with you this neat little way to present potato salad.  Give them a try or put your own twist to them.  I am sure that they will be a hit at your next gathering!!


Click HERE for the recipe.

Enjoy!


Saturday, March 17, 2012


Happy St. Patrick's Day Everyone!!


You have your green on??


Keep Inspiring!

Monday, February 20, 2012

Yikes! Alien Invasion!

Alien Invasion Cupcakes


Yikes! I have been invaded by Aliens!

These cute cupcakes were the wants and needs by a 4 year old neighborhood boy. Sooooo.....off to the store I went to get a few ingredients so these "neon green" Aliens could find a new home!
Try them and put a smile on someone!

Supplies needed:


Now let's bake some cupcakes!


Alien Invasion Cupcakes


  • 24 Chocolate Cupcakes baked in silver foil liners (Reynolds) click HERE for recipe.
  • 2 cans (16 ounces each) vanilla frosting (not the whipped kind)
  • Neon green food coloring (McCormick)
  • 12 Marshmallows
  • 24 plain doughnut holes
  • 48 black candy-coated chocolate-covered sunflower seeds (Sunny Seed Drops)
  • Black licorice laces, cut into 1-inch pieces
  • 24 plastic take-out containers (available at baking or party supply stores)
  1. Tint the vanilla frosting green with the food coloring.  Using clean scissors, cut the marshmallows in half crosswise.
  2. Spread a thin layer of the green frosting on top of the cupcakes and place 1 marshmallow half in the center of each cupcake, cut side down.   Add a dot of frosting to the marshmallow and place a doughnut hole on top of the marshmallow, pressing it into the frosting. Spread frosting over the marshmallow and the doughnut holes to fill in the gaps and smooth.
  3. Place the assembled cupcakes on a cookie sheet in the freezer for 10 to 15 minutes or until slightly frozen.
  4. Working in batches,spoon 3/4 cup of the remaining frosting into a 1-cup glass measuring cup.  Microwave for 10- to 15-second intervals, stirring frequently, until the frosting is the consistency of lightly whipped cream.
  5. Holding a chilled cupcake by its foil liner, dip it into the frosting right up to the edge of the liner.  Hold the cupcake above the surface and allow the excess frosting to drip off.  Carefully turn the cupcake right side up and place on a  cookie sheet.  Repeat with the remaining cupcakes.  When the frosting becomes too thick, reheat in the microwave for several seconds, stirring well.  Add more frosting and reheat as necessary.
  6. Press the black sunflower seeds onto the head area, pointed ends in, to make the eyes.  aUsing a round toothpick, make 2 holes in the top of each alien and insert a piece of licorice in each hole for the antennae.
  7. Carefully place each cupcake into a plastic container and top with the lid.


Enjoy your Alien Invasion!!


Keep Inspiring!

Chocolate Cake

CHOCOLATE CAKE


Makes two 9-inch cakes or 24 cupcakes

  • 1 1/2 cups cake flour
  • 1 1/2 cups sugar, plus more for unmolding the cakes
  • 1/2 cup (1 stick) unsalted butter, softened at room temperature 
  • 1/3 cup unsweetened Dutch-process cocoa powder
  • 1 tsp. baking soda
  • 1/4 tsp. baking powder
  • 1/3 cup melted unsweetened chocolate (such as Baker's)
  • 1/2 cup hot water
  • 2 extra-large eggs
  • 1/2 cup buttermilk

  1. Position a rack in the center of the oven, and preheat to 350 F (360 F for cupcakes)
  2. Put flour, sugar, butter, cocoa, baking soda, and baking powder in the bowl of a stand mixer fitted with the paddle attachment.  Mix on low speed just until the ingredients are blended together, a few seconds, then raise the speed to low-medium and continue to mix until smooth, approximately 1 additional minute.
  3. Stop the mixer and pour in the chocolate.  Mix for 1 minute on low speed.  With the mixer on, pour in the hot water.  Add the eggs, one egg at a time, adding the next one after the previous one has been absorbed.  With the mixer still running, pour in the buttermilk.  Stop periodically and scrape from the bottom with a rubber spatula to be sure all the ingredients are fully integrated, and return the mixer to low-medium speed.  Continue to mix for 1 additional minute to ensure the eggs are full absorbed. Before baking, be sure the batter is between 70 and 73 degrees, or the cake will crown.
  4. Grease two 9-inch cake pans (2 inch deep) and flour them.
  5. Divide the batter evenly between the two cake pans, using a rubber spatula to scrape down the bowl and get as much batter as possible out.
  6. Bake until the cakes begin to pull from the sides of the pan and are springy to the touch, 25 to 30 mins.
  7. Remove from the oven and let cool for at least 30 minutes, preferable 1 hour.  The cakes should be at room temperature before you remove them from the pan. Put a piece of parchment paper on a cookie sheet, sprinkle with sugar, and turn the cakes out onto parchment; the sugar will keep them from sticking.

Enjoy!


Keep Inspiring!

Saturday, February 4, 2012

Old World Charm (part 3)

Old World Charm (part 3)

Hello, Everyone!!  What have you been up to?? Share with me!!

Well, the groundhog has seen his shadow which means for many of us 6 more weeks of winter.  Living in WV, I have been wondering.....did winter ever start? Will we finally get some snow?  My spring bulbs have emerged from the ground and have a good 8 to 10 inches of leaves on them. Crazy!

I am going to continue our journey with the Old World Charm and hope that you enjoy your visit to Santorini.


Good Morning Crete!


I believe that is snow up there on those mountains.....


 .... with the clear blue water crashing against the rocks.


If I had a way to bring that home, I wonder how I would have showcased it!


The road to the shopping world. however we did not make it. I had an issue with my new bank card where all of my shopping money was and had emergency US dollars on hand. It was a big issue and the bank had no clue why it didn't work. Despite of the issue, we still had a wonderful time, just not a lot of treasure to bring back.  Next time....


Awe.....Santorini!


The layers in the ground from the Lava


 A view of Santorini Caldera Cliffs


Imagine creating a tablescape here...  What would you serve?


A wall made out of the volcanic rock


Here is not such a good picture because we were on the bus...moving but it is there grapevine vineyards. They said because of the soil that the vines produce a better product in "wreaths" instead of growing up on trellises. I don't know but the wine was good and it was a great visual.


A view of the volcano from the caldera cliffs. Our cruise ship awaits us.


Shopping, Shopping, Shopping!!


Okay, you can take donkey ride to the bottom of the cliffs or ride them to the top to get to the villages. They say if you are going to ride, ride up because they get fed at the bottom of the cliffs! I elected to do neither. I was on a tour which a bus took me to the top.......


....and the cable car took me to the bottom.


Bye Santorini for now..... I hope to visit you again!!

Next on our Old World Charm.....Athens, Greece!  Our final destination~
If you missed part 1 and 2, click HERE and HERE to take the journey.

Keep Inspiring!!